Thứ Sáu, 27 tháng 11, 2020

addon loom for blender

addon loom for blender

Loom

 Loom is a blender addon designed to simplify the process of rendering image sequences and specific frames.

Render Image Sequence Dialog CtrlShiftF12

Using this dialog allows to render quite complex frame rangessingle framessubframes as well as exclude frames and ranges without manipulating the Timeline, in the background (optional).

Render Image Sequence Dialog

For example, you can enter 1, 2, 3, 5-10 to render only those frames.

 In order to exclude e.g. frame 7 from 1-10 range, just add a caret or

 exclamation mark followed by the number, like ^7 to render frame 1-6, 8-10 

(similar when specifying multiple ranges on the command line).

Examples

Input (Range)Output (Frames)
1, 2, 3, 5-101, 2, 3, 5, 6, 7, 8, 9, 10
1-5, 10-151, 2, 3, 5, 10, 11, 12, 13, 14, 15
1-10 ^71, 2, 3, 4, 6, 8, 9, 10
1-10 ^3,41, 2, 5, 6, 8, 9, 10
1-10 ^3-51, 2, 6, 8, 9, 10
1-10 ^3-5, 91, 2, 6, 8, 10
1-10 23-29 ^3-5, 7-91, 2, 5, 6, 10, 23, 24, 25, 26, 27, 28, 29
1-10x21, 3, 5, 7, 9
1-10x2 101, 3, 5, 7, 9, 10
1-10x2 10 ^51, 3, 7, 9, 10
1-2x0.11.0, 1.1, 1.2, 1.3, 1.4, 1.5, 1.6, 1.7, 1.8, 1.9, 2.0
1-2x0.1 ^1.4, 1.51.0, 1.1, 1.2, 1.3, 1.6, 1.7, 1.8, 1.9, 2.0

You can also render every nth frame of the scene by adding x followed by any number after the range, which allows to indicate incrementation steps. For example, 1-10x2 renders every second frame of the given range 1, 3, 5, 7, 9. This way, you can render subframes by indicating a float value like x0.1 or even x0.01 to get slow motion.

SlowMo
1-17x0.25 @25fps (without motion blur)

Options

  • You can verify the output before rendering the animation by clicking the Verify Output operator I1, which reports all frames that are going to be rendered (in the Info Area as well as in the terminal)

  • You can enable Filtering I1 to handle each number after the caret (^) separatly, this allows to add single frames or frame ranges right after any excluded frame, e.g. 1-10 23 ^3-7 4 6 renders 1, 2, 4, 6, 8, 9, 10, 23 instead of 1, 2, 8, 9, 10, 23 if the property is disabled

  • You can render specific keyframes by selecting the keys in the Dope Sheet or the Graph Editor and calling Render Selected Keyframes operator via spacebar, which automatically adds the frames to the render list:

    Render Selected Keyframes

Encode Image Sequence Dialog CtrlShiftF9

If FFmpeg is installed on your machine and set up properly in the

 Addon Preferences, this dialog allows to encode image sequences 

to ProRes or DNxHD/DNxHR for preview or layout purposes. 

You can select any image sequence, set the output colorspace 

(useful for encoding linear exr sequences), the frame rate and the desired codec.

Encode Image Sequence Dialog

Options

  • Select ProRes 4444 XQ to get an alpha channel

  • You can verify the image sequence on disk before encoding by clicking the

  •  Verify Image Sequence operator I1

  • which also detects all frames missing frames of the sequence

    Encode Image Sequence Dialog

  • In case there are missing frames, the addon either provides an utility function to fill the gaps of the image sequence with copies of the nearest frame to get the full lenght animation and another operator to render all missing frames:

Loom Batch Dialog CtrlShiftAltF12

The batch dialog allows to render multiple .blend files and encoding their

 output sequences by using the command line in one go.

 You can either scan any directory or add the .blend files manually,

 re-order them and specify the render range or single frames for each file similar

 to the Render Image Sequence Dialog.

Loom Batch Dialog

Notes

  • Encoding takes place after the rendering (path tracing) is done

  • Execution of that operator generates a batch file in blender's scripts directory (.sh or .bat depending on the operating system) and runs all commands via command line one by another - you can make the generated batch files your own and modify them (for easy access, click the disk icon right beside Delete temporary batch file operator in the Addon Preferences, to open up blender's scripts directory on your system)

  • In case you need more space within the dialog itself or e.g. you'd like to see the path of each file, you can change the appearance of the elements within the dialog by clicking the arrow to change the display settings directly:

    Loom Batch Display Menu

Addon Preferences

The available settings are slightly different per operating system. However, you can set the size of each dialog, set the path to the ffmpeg binary, access as well as remove the batch files and edit the shortcuts on all operating systems.

PropertyDescription
Display Buttons in Render PanelDisplays all loom operators in the Render Panel (except the Batch Dialog)
Playblast (Experimental)Allows to playback the latest rendered image sequence by using ShiftCtrlF11 hotkey (requires restarting blender after saving the User Preferences)
Default Animation PlayerForce using the default Animation Player (User Preferences > Files > Animation Player) for Playblast operator
Path to FFmpeg BinaryOnly required if not already part of your linux distribution or not added to the environment variables
Force generating .sh or .bat FileGenerates a batch file for all command line operations, even if those are single ones
Delete temporary .sh or .bat FileRemoves all generated batch files found in blender's scripts directory
Xterm (Terminal Fallback)Fallback for all command line operations if the system terminal is not supported, Xterm is available for most Linux Distributions and older Versions of MacOS
Reset PreferencesReset all properties to their default values (except the binary path to ffmpeg)

Gotchas and Limitations

  • Activation of the Playblast hotkey requires restarting blender
  • In case encoding fails for some reason, make sure the path to ffmpeg binary is absolute
  • Renewal of hotkeys once entirely removed, requires resetting the Addon-Preferences and restarting blender
  • Switching the terminal back from Xterm to the default system terminal requires resetting the Addon-Preferences in some cases

Installation

  1. Download the latest release
  2. In Blender open up User Preferences > Addons
  3. Click Install from File, select loom.py and activate the Add-on

Contributions to Loom are welcome. Successfully tested on Arch Linux 2017+Ubuntu 16.04+MacOSX 10.6.8+Windows 7+.

Addon BlenderGamerig

Addon BlenderGamerig

 Addon for blender BlenderGameRig

Back to Blender and open Preference Window, and click 'Install...' button.
addonpanel

Choose downloaded zip file and click 'Install add-on from File...' button.

installaddon

Then GameRig will be found in Add-on list (filtering by categoly 'Rigging',

 you can find faster), click check box to activate.

addedaddon

Add 'metarig'

Mode: Object Mode

Hotkey: ⇧ A

Menu: Add → Armature → GameRig

add metarig menu

added metarig

Adjust metarig

Edit metarig armature, let it fit to your character mesh.

adjusted metarig

Set vertex group for armature deforming.

GameRig will copy bones without renaming differs from 'rigify',

 you can test armature deforming with metarig armature.

setup vertexgroup

Add additional bones

If your model has hair / cloth / etc. bones, add these too.

These bones will be copied to generated rig.

If they have constraints and/or have drivers, these will be copied too with right target.

final metarig

Generate rig

When you are ready, click 'Generate New Rig' Button of Armature Properties tab.

armature panel

Done.

generated rig

Parent mesh objects to rig armature.

parenting

In pose mode, you can make pose or animation with generated rig featuring IK/FK blending, etc.

posing

Rig's special parameters and functions will be available in 'GameRig Properties' panel that be placed on Item tab of Sidebar.

properties

Regenerate rig

If you feel some bones have bad positions, it means you need to edit metarig again,

 but you can regenerate rig quickly after edit metarig.

Edit metarig again, and click 'Regenerate rig' button to apply changes.

regenerate

Note:

Please confirm current collection contains target rig to overwrite.

Otherwise, gamerig generate a new rig to current active collection.

wrong collection

Deference from Rigify

Clean hierarchy

GameRig dosen't rename original bones and dosen't add deform bone and dosen't insert any bones to original bone tree.

More suitable for game / VR content development.

unity mechanim avatar

Multi Face Rig

More flexible face rig.

multihead metarig multihead rig

Blend animation and physic simulation result

'generic' and 'tentacle' rig can blend between own result and 

metabone's constraint result if metabone have constraint.

rigphysicsblend

Tips

How to use with an existing armature

An armature not recognized as GameRig's metarig,

 the armature's properties panel has no GameRig panel.

Then you cannot setup metarig with existing armature.

no gamerig panel

In this case, add 'Single Bone' metarig and join (Ctrl + J / Menu Object→Join) an existing armature to it. And remove 'root' bone from metarig if you don't need it.

Gamerig panel will be available in armature properties panel.

add single bone

joined armature

In pose mode, you can set rig parameter in GameRig Rig Type panel that be placed on bone properties tab.

edit rig type

Why 'Unity Mechanim/Human' metarig has X 90° rotation

By deference of coordinate system between Blender and Unity,

 imported mesh lie down in Unity with a fbx file exported by Blender.

 This is a reason of metarig has X +90° rotation (GameRig generates a rig with 

same rotation as metarig).

imported fbx 1

Rig armature having X +90° rotation and their children having X -90° rotation, 

and settings of export fbx are:

  • scale is 0.01
  • 'Apply Unit' is off
  • 'Apply Transform' is on

and Unity side import settings are:

  • Scale is 1.0
  • 'Convert Unit' is off

parent has x +90° rotation child has x -90° rotation export setting import setting

These settings make imported fbx object having right orientation and clean transform (no rotation, no scaling) on Unity.

Note:

For combination of Blender 2.80 and Unity 2019.1

I was using deferent settings for same effect in Blender 2.79 and Unity 2018.4 era.

no rotation and no scale

License

GNU GENERAL PUBLIC LICENSE

Thứ Năm, 26 tháng 11, 2020

Thứ Năm, 12 tháng 11, 2020

6 phần mềm điêu khắc mẫu 3D tốt nhất năm 2018 (4 miễn phí)

6 phần mềm điêu khắc mẫu 3D tốt nhất năm 2018 (4 miễn phí)

 Nâng cấp tính năng của chúng tôi, trong thế giới của chúng tôi, trong thế giới của chúng tôi. cong và kiểu dáng tự động làm.

Mô hình văn bản 3D 3D: ArtStation

Có rất nhiều công cụ hiện có để tạo mô hình 3D. Một tiểu thể loại của các công cụ như vậy là phần mềm điêu khắc 3D, chuyên dùng để tạo mô hình bằng cách thao tác với các vật thể như thể chúng được làm từ đất sét. Phong cách mô hình hóa này – được sử dụng để tạo ra các tác phẩm điêu khắc, bán thân, động vật và nhân vật tưởng tượng, trong số các thiết kế khác – có khả năng tạo ra các hình dạng tự do hơn so với mô hình tham số – được sử dụng để tạo cầu, lắp ráp cơ khí hoặc tòa nhà.

Theo nghĩa hiện đại, thuật ngữ công cụ điêu khắc 3D, thường sử dụng các công cụ bổ sung để vẽ, kết cấu và vẽ mô hình điêu khắc. Bạn sẽ thấy rằng nhiều trong số các tính năng bổ sung này đi kèm với nhau vì chúng có thể quan trọng như chính mô hình.

Phần mềm điêu khắc được sử dụng trên nhiều ngành công nghiệp, như thiết kế trò chơi, nhân vật hoạt hình, phim, kỹ thuật và thiết kế sản phẩm. Sau đây chúng tôi liệt kê một số phần mềm điêu khắc 3D trả phí và miễn phí phổ biến nhất.

PHẦN MỀM ĐIÊU KHẮC 3D

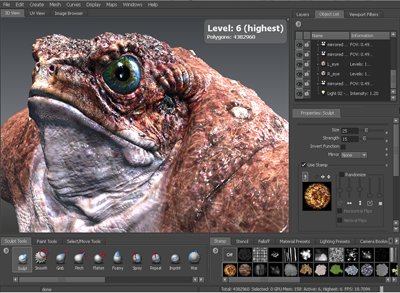
Mudbox

 Giao diện người dùng Mudbox

Nếu bạn đã đầu tư vào các sản phẩm Autodesk khác, bạn sẽ cảm thấy may mắn.

Chi phí: $ 10 / tháng HOẶC $ 80 / năm

Autodesk không phải là thành viên mới trong khối phần mềm mô hình. Và điều đó chắc chắn rõ ràng từ sản phẩm mới nhất của họ trong thế giới điêu khắc 3D: Mudbox. Phần mềm này là nằm torng top hàng đầu trong ngành, chỉ bị đánh bại trong một số lĩnh vực bởi ZBrush, một lựa chọn chuyên nghiệp phổ biến khác.

Công cụ này có thể xử lý mô hình đa giác cao – dĩ nhiên, dễ dàng – và thậm chí cung cấp tùy chọn vẽ bản đồ ngay trên lưới của bạn, một vài công cụ có thể so sánh có thể cung cấp. Ngoài các tính năng điêu khắc 3D thông thường, người ta còn có thể kéo một số con thỏ độc đáo ra khỏi mũ của nó, như sửa cấu trúc liên kết để phân phối mật độ đa giác.

Tuy nhiên, lợi thế lớn nhất của Mudbox, đặc biệt là đối với các penny-pinchers trong khán giả, là giá của nó, hợp lý hơn khi so sánh với ZBrush tương đương với chức năng gần nhất (ít nhất là trong ngắn hạn).

Hình ảnh sản phẩm của Mudbox

AUTODESK MUDBOX

PHẦN MỀM 3D

Blender

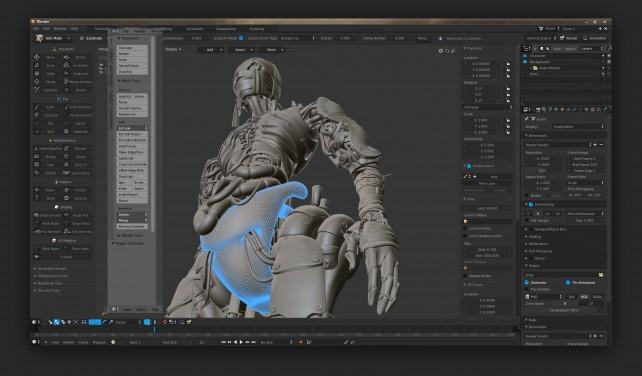
Giao diện của Blender Nguồn: Blender Artists

Vì vậy, nhờ tính năng mà nó có thể thay thế hệ điều hành của bạn.

Chi phí:  MIỄN PHÍ

Kìa! Công cụ điêu khắc mã nguồn mở nổi tiếng được nhiều người yêu thích. Với các chức năng điêu khắc tiên tiến (nhưng không phải là tốt nhất về mặt kỹ thuật), trình chỉnh sửa video, tùy chọn nhân vật hoạt hình và điều khiển kết cấu được kết hợp với nhau, đây là một phần mềm điêu khắc 3D miễn phí rất mạnh.

Thật khó để hiểu hết các tính năng của phần mềm này. Để giúp giải thích tất cả các tính năng, Blender đã tạo một video.

Nhược điểm duy nhất của tất cả phần mềm này này là một đường cong học tập dốc hơn bình thường. Không có kết thúc của các menu và nút ẩn, thật khó để giới thiệu Blender cho hầu hết mọi người. Trừ khi bạn có kế hoạch sử dụng tất cả các chức năng phụ của Blender, có thể đáng để chọn một công cụ khác được thực hiện 100% cho điêu khắc 3D.

PHẦN MỀM ĐIÊU KHẮC 3D

ZBrush

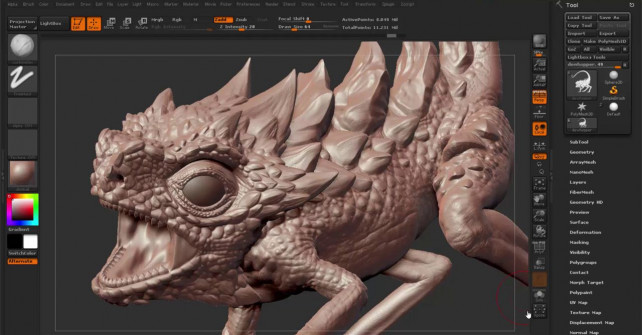
Giao diện người dùng của ZBrush Nguồn: CGMeetup

Vẫn là giấc mơ của một nghệ sĩ 3D.

Chi phí:  $ 895

ZBrush sẽ điêu khắc 3D vì General Electric dành cho ô tô, đủ khả năng cho tất cả mọi người từ những người khởi nghiệp đến các chuyên gia. Và là một trong những sản phẩm điêu khắc lạ mắt nhất trong danh sách này, không có gì lạ khi ZBrush rất phổ biến.

Chúng tôi sẽ không đi sâu vào chính xác những gì làm cho phần mềm này trị giá hơn 800 đô la, nhưng bạn có thể yên tâm trong khi bạn sử dụng tối đa thẻ tín dụng của mình rằng đó là vũ khí được lựa chọn cho nhiều nghệ sĩ 3D chuyên nghiệp.

Trừ khi bạn biết chắc chắn rằng bạn sẽ cần ZBrush, về lâu dài, bạn có thể không nên mua với nó, không chỉ vì mức giá quá đắt mà còn bởi vì các nhà phát triển phục vụ cho phần lớn khách hàng của họ, các chuyên gia. Do đó, cộng đồng và các cuộc thảo luận xung quanh ZBrush có vẻ không thú vị đối với một người có sở thích điêu khắc chỉ muốn làm cho một sản phẩm cho vui.

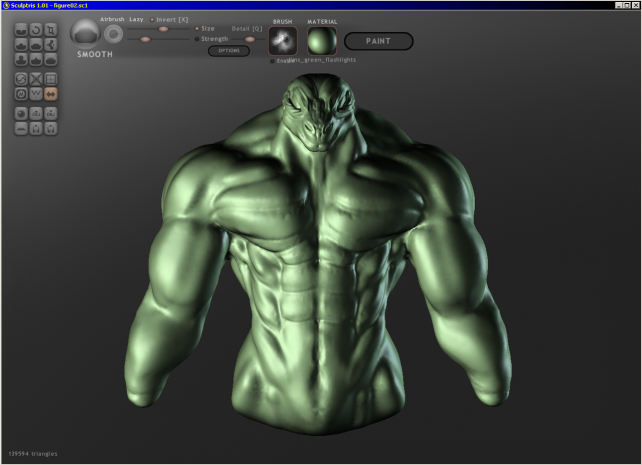
Sculptris

Giao diện của nhà điêu khắc

Nếu bạn thực sự thích ZBrush nhưng muốn tiết kiệm tiền (hoặc tám trăm), thì đây là dành cho bạn.

Chi phí:  MIỄN PHÍ

Sculptris, được sản xuất bởi cùng một công ty sản xuất ZBrush, là phần mềm điêu khắc 3D miễn phí nhắm vào người mới bắt đầu. Giao diện và các điều khiển rất giống với ZBrush, điều này làm cho nó là một cách tốt khi muốn chuyển sang các chức năng nâng cao hơn của ZBrush sau này.

Khi mới bắt đầu, nên sử dụng Sculptris miễn phí trong một thời gian, sau đó chuyển sang ZBrush, biết rằng bạn sẽ có thể sử dụng các chức năng của nó một cách thoải mái (vì tất cả đều tương tự như Sculptris).

Chính nó, Sculptris là một công cụ có hạn chế một chút cho điêu khắc 3D. Ở một số khu vực, có cảm giác như nó đã được tạo ra để trở thành một bản dùng thử ZBrush không bao giờ hết hạn. Bạn được điều khiển thao tác cơ bản khi nói đến điêu khắc, nhưng bạn có thể thấy mình muốn có thêm chỗ để phát triển. Tuy nhiên, đôi khi bạn nên dùng thử để có cảm giác về tất cả những chức năng xung quanh ZBrush.

PHẦN MỀM ĐIÊU KHẮC 3D

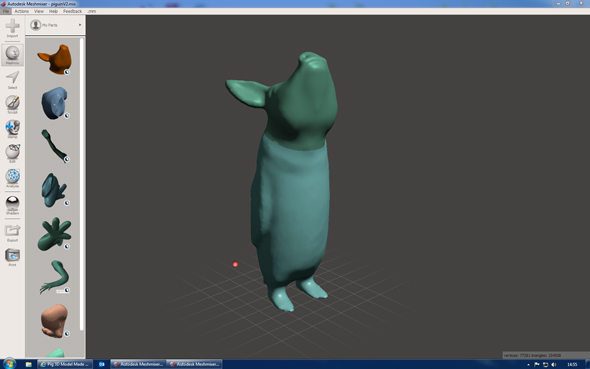
Meshmixer

Piguin sản xuất tại Meshmixer Nguồn: Materialize

Nếu bạn đang điêu khắc để in 3D, đây là đặt cược tốt nhất của bạn.

Chi phí:  MIỄN PHÍ

Một viên đá quý khác từ công ty khổng lồ Autodesk hình thành dưới dạng Meshmixer. Được biết đến như là Photoshop Photoshop của in 3D, phần mềm điêu khắc 3D miễn phí này chứa đựng rất nhiều tiềm năng bên dưới giao diện đơn giản của nó.

Bạn sẽ thấy bạn có thể điều khiển các mắt lưới cơ bản cũng như trộn nhiều lưới lại với nhau để tạo thành bất kỳ loại chimera sáng tạo nào bạn nghĩ đến. Một ví dụ là Piguin được mô tả ở trên, được thực hiện với Meshmixer.

Nhưng món quà tuyệt vời nhất trong Meshmixer là khả năng chuẩn bị các mô hình cho in 3D. Trong hầu hết các trường hợp, các mô hình bạn điêu khắc trong các nền tảng điêu khắc lạ mắt khác cần phải đi qua cái này trước khi được in 3D. Vậy tại sao không sử dụng nó trong phần điêu khắc của quy trình làm việc? Vì nó có thể tạo ra những mô hình tuyệt vời không thể phân biệt với những mô hình được sản xuất trong phần mềm khác.

PHẦN MỀM ĐIÊU KHẮC 3D

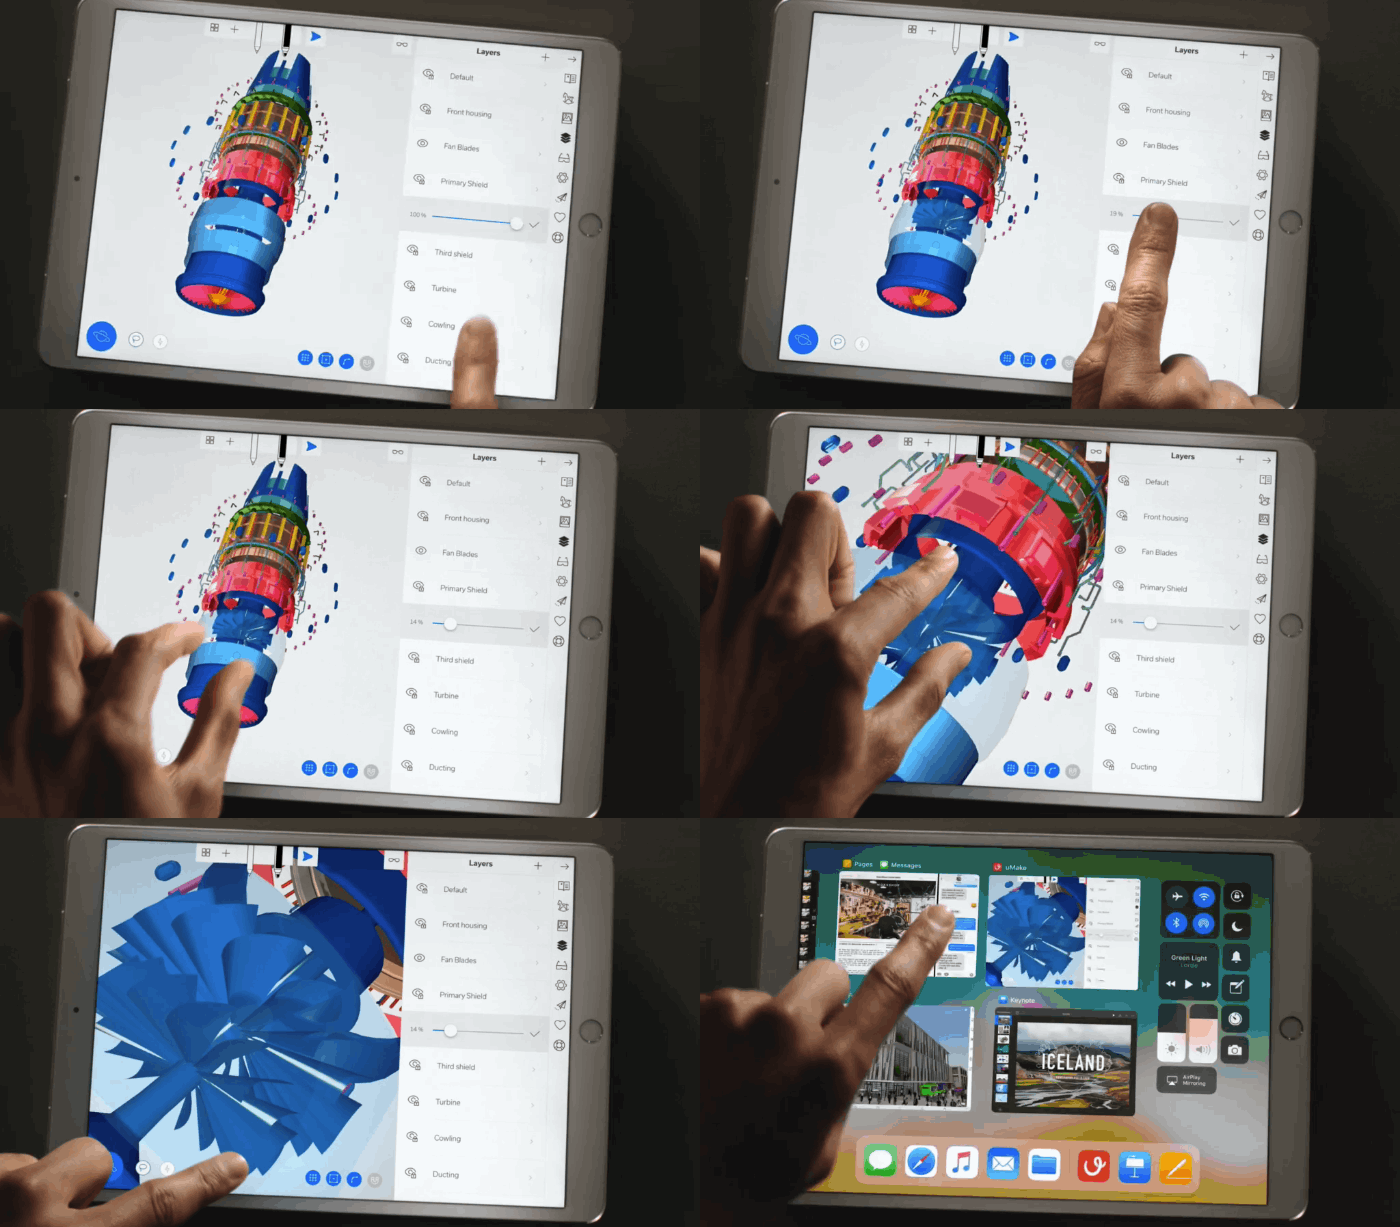
uMake

Ứng dụng uMake

Quá trình mô hình độc đáo nhất và tùy chọn duy nhất cho người dùng iPad.

Chi phí:  MIỄN PHÍ, hoặc $ 10 / tháng ($ 80 / năm)

Có ai đó đã từng nghĩ rằng, tôi ước mình có thể điêu khắc các mô hình 3D trên iPad của mình. Và thế uMake ra đời.

Trong phần mềm, phần mềm, phần mềm và phần mềm, phần mềm và phần mềm. Thời gian, tình yêu là một trong những mối quan hệ tình cảm và tình cảm. Căng ra, thực đơn của chúng tôi và một trong những thứ khác nhau. Có thể có một phần lớn trong khi bạn có thể sử dụng một phần của họ.

Bạn có thể có một phần của họ, bạn có thể có một phần của họ. Các mục trong danh sách của bạn Kết cấu của chúng tôi và không có gì. Do,, có thể là một trong những thứ khác nhau. Không thể thiếu và vui vẻ.